Safe And Sound:

screenshot (55)

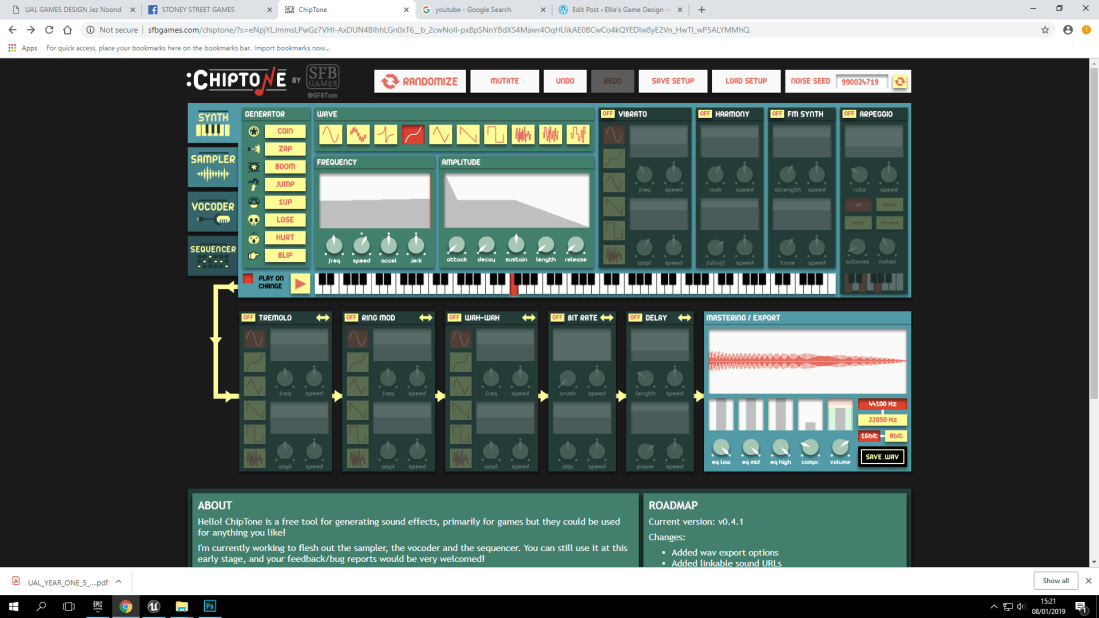
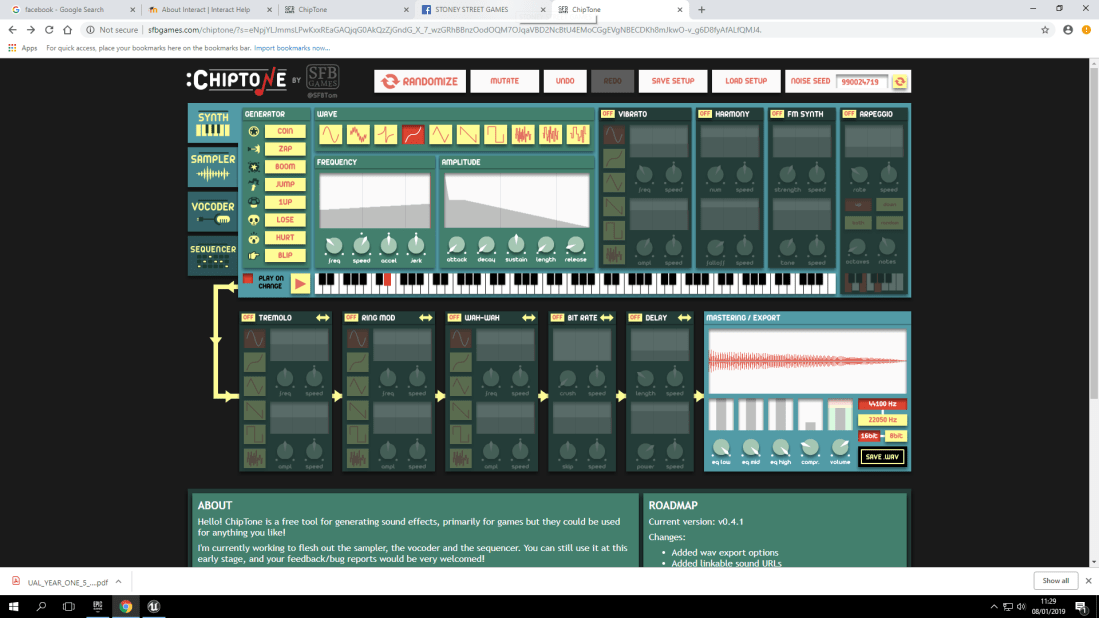
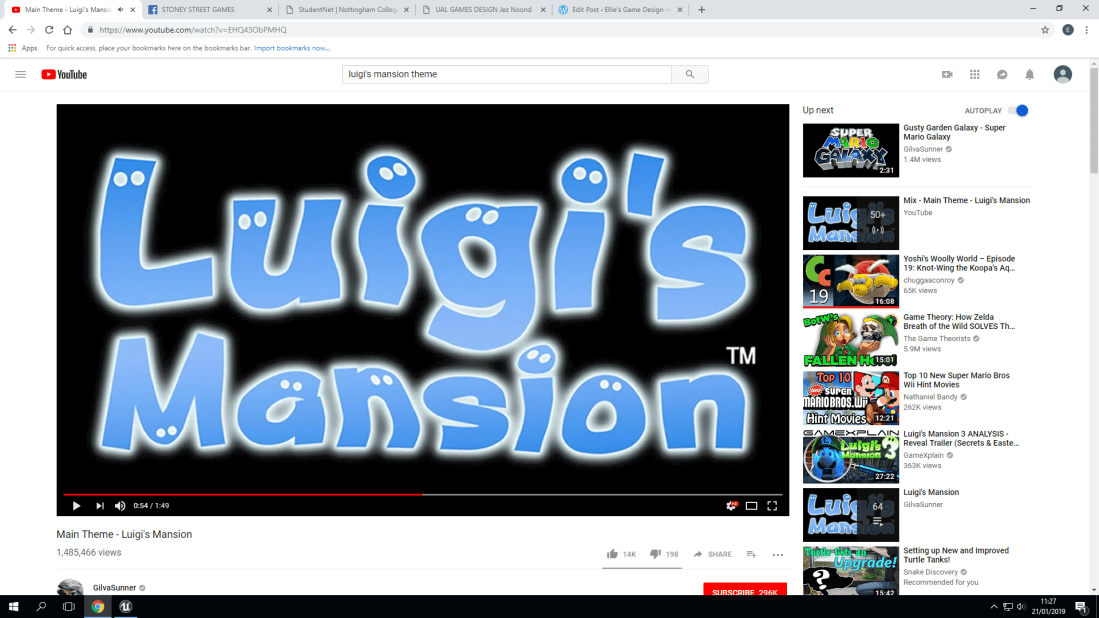
This new project is all about sound! With the sound, I decided to study different types of ambience! (Ambience means the atmosphere and character that the music creates). With the ambience created by a GameCube classic, (Luigi’s Mansion) creates a tense and unsure ambience, Since in the ambience we get to hear Luigi (The protagonist) humming to the tune that we also hear as the player. But if you have played other Mario games, Then you will know the character of the younger brother to the Nintendo hero we all know and love. The reason why I mention this is because Nintendo did this on purpose, To further give the players an uneasy sense of ambience in the sounds and music played because of the character’s vocal lines having the same ambience!

screenshot (74)

Kirby’s Epic Yarn! A personal favorite game of mine just for the ambience! The reason why this ambience is not only because of the reason above, But instead of Luigi this time it’s Kirby! A pink puffball who’s always cheery and hyperactive! For the actual theme of the ambience it’s very cheery and uplifting, similar to the personality that Kirby is known for. This is also because Nintendo mainly makes child-friendly games that fans are going to remember. This is one of those games that people remember for the amazing music (ambience).

screenshot (75)

Now we move onto a more classical horror game. Resident Evil 1 (For the playstation. Not the remastered version. This is the original one). With the backstory for this game, You play as two main characters, Jill Valentine and Chris Redfield. In the game, the place that you explore is huge. However, the main hall is a place you will visit frequently. For the ambience of this it makes you very on edge. This could be because you can often find enemies near or in the main hall as you explore. But that also does mean that this ambience can also be described as ominous. You don’t know much about why you’re here or where the other characters are, Which means that this ambience plays perfectly into the story that this game tells.

Part One: 3 Types Of Sound:

The three types of sound that we learned and experimented with are called:
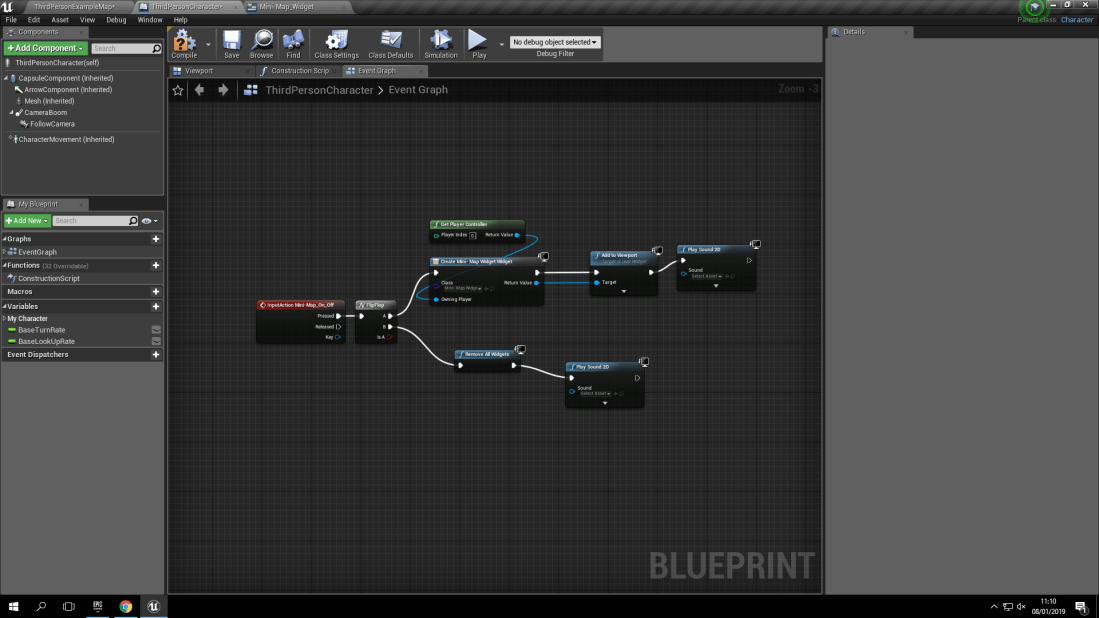
  • Play Sound 2D
  • Play Sound at location
  • Sound Cue with attenuation (Plays sound in the world)

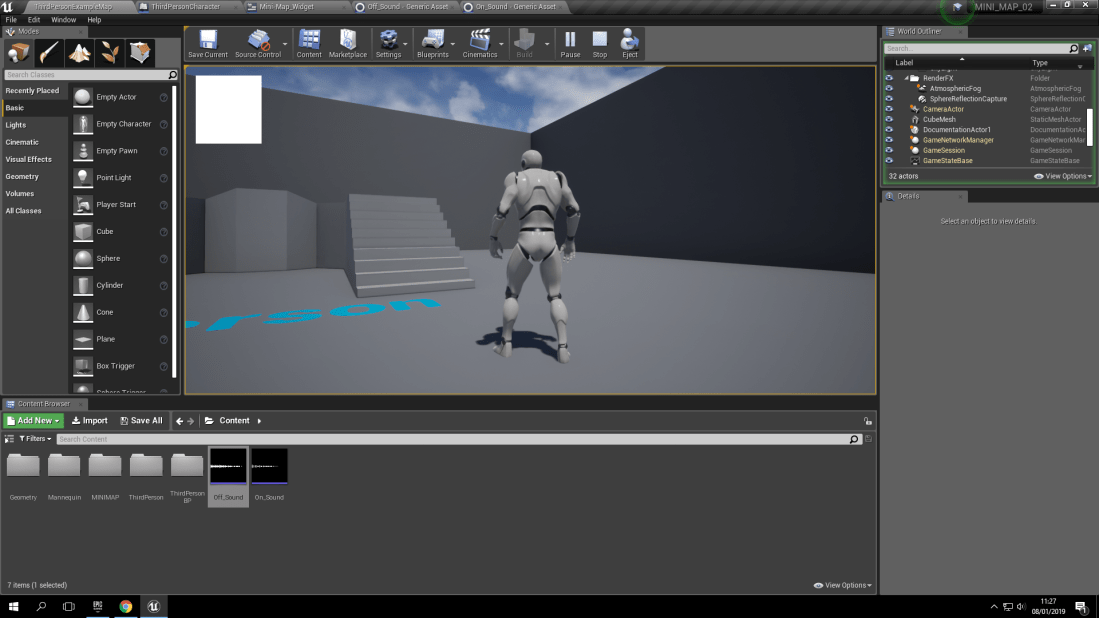
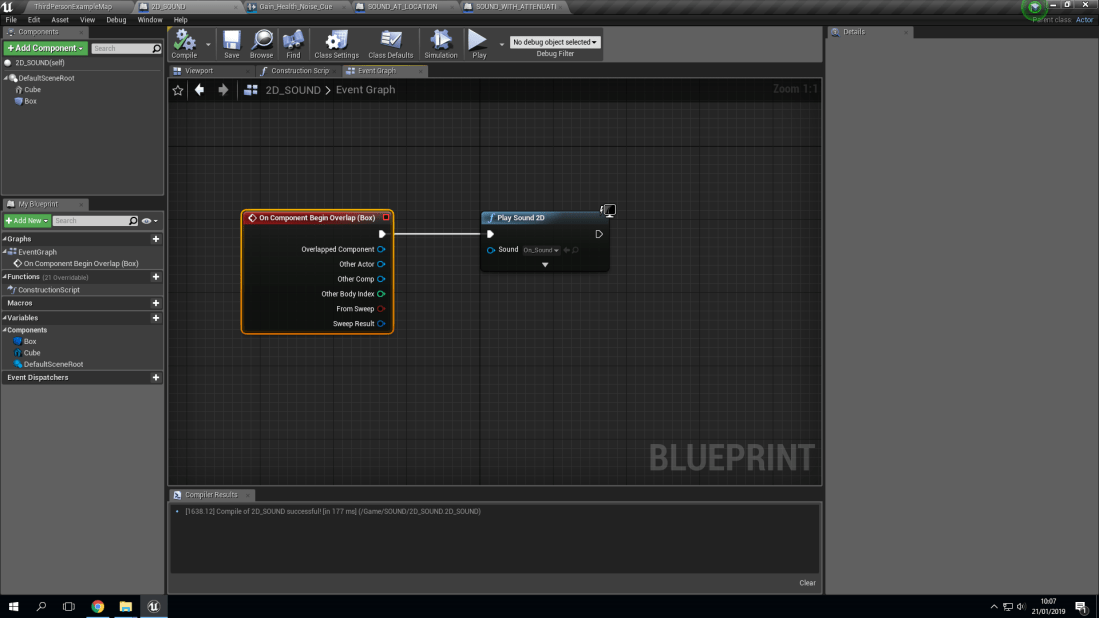
Play Sound 2D: What Does It Mean?:

With the type of sound known as ‘Play sound 2D’ it means that the sound will be played in a 2D fashion. What this means is that it will only be heard when the collision box it’s associated with will play the sound. Which is then programmed via a blueprint to play the sound once when the collision box is triggered. For example, In my world, I made a simple cube and added a collision box to it. Then I made a blueprint inside of the collision box (Which is called ‘Box’ to stop any confusion).

screenshot284929

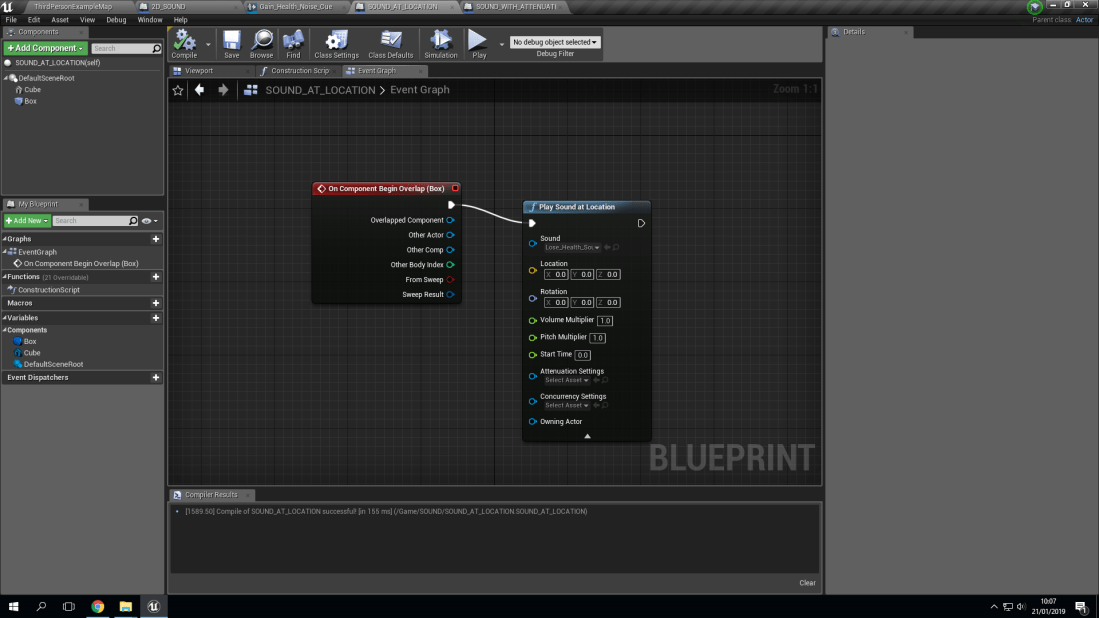
Play Sound At Location: What Does It Mean?:

With playing a sound at a location, what this means is that you are able to program the sound to play at a certain location as long as you program it correctly. For example, if you were to program the sound to play 50 units in the x axis to your player then as soon as they trigger the collision box, the sound will play at the location that you have decided to make the sound play at.

Screenshot (51).png

Sound Cue With Attenuation: What Does It Mean?:

Attenuation is known to be defined as the reflection of a sound or an electrical current. To further define this, Attenuation can be described as how you hear sound. The further you are from the source (What is making the sound) the quieter it will be. It can be defined also with terms such as Attenuation is how much distance you have from the epicenter of the source, which means the volume will be higher or lower depending on the distance you have from the source.

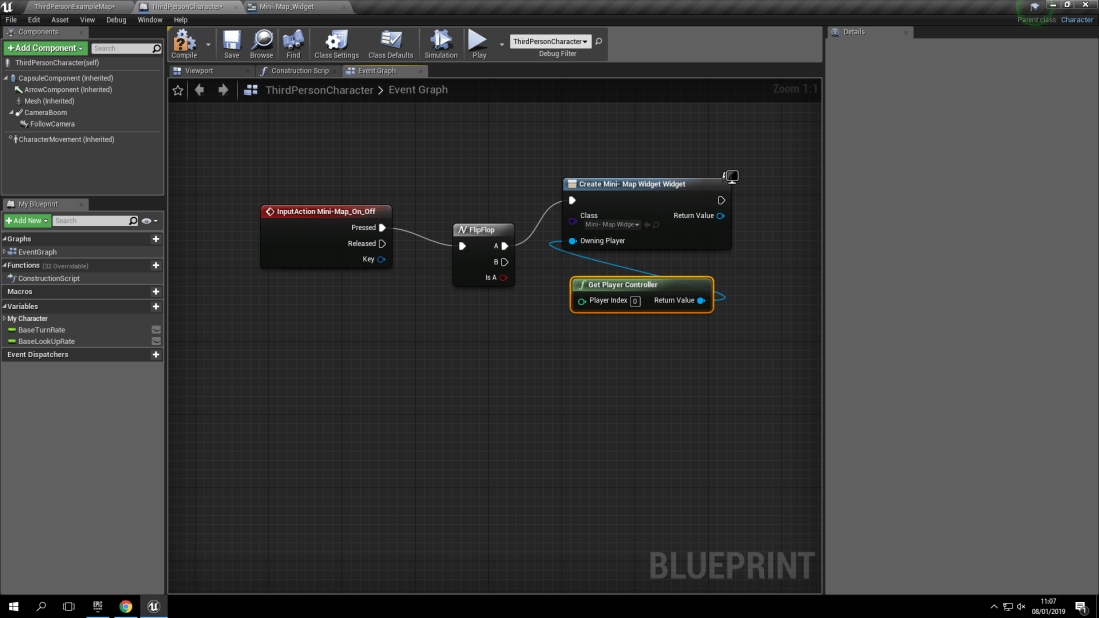
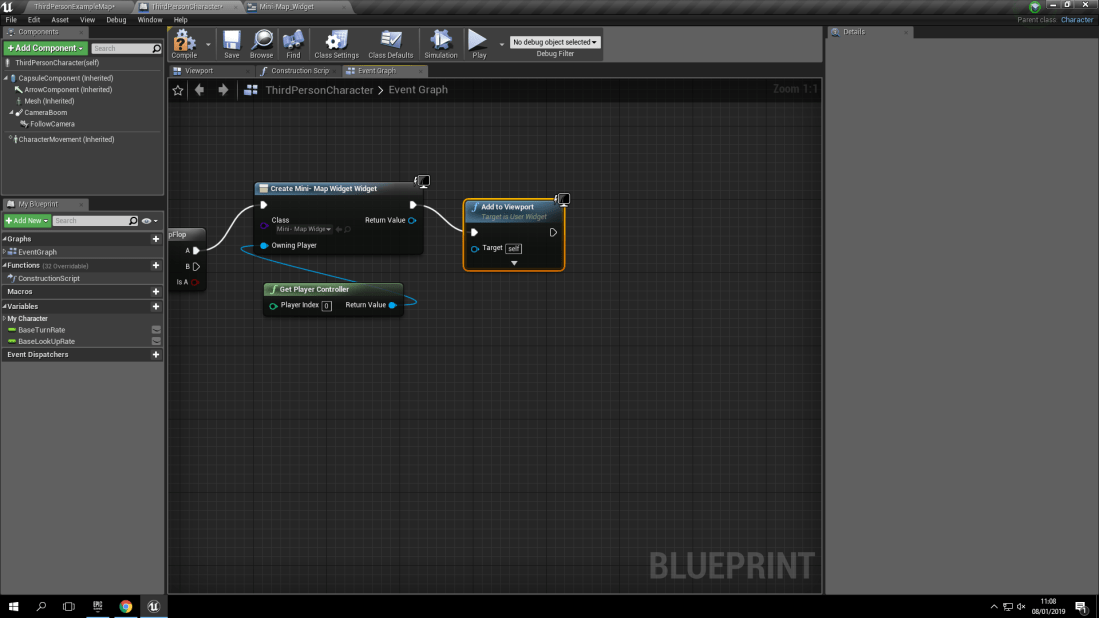
Part Two: Violins And Determination:

screenshot (97)screenshot (98)screenshot (99)screenshot (100)screenshot (101)screenshot (108)

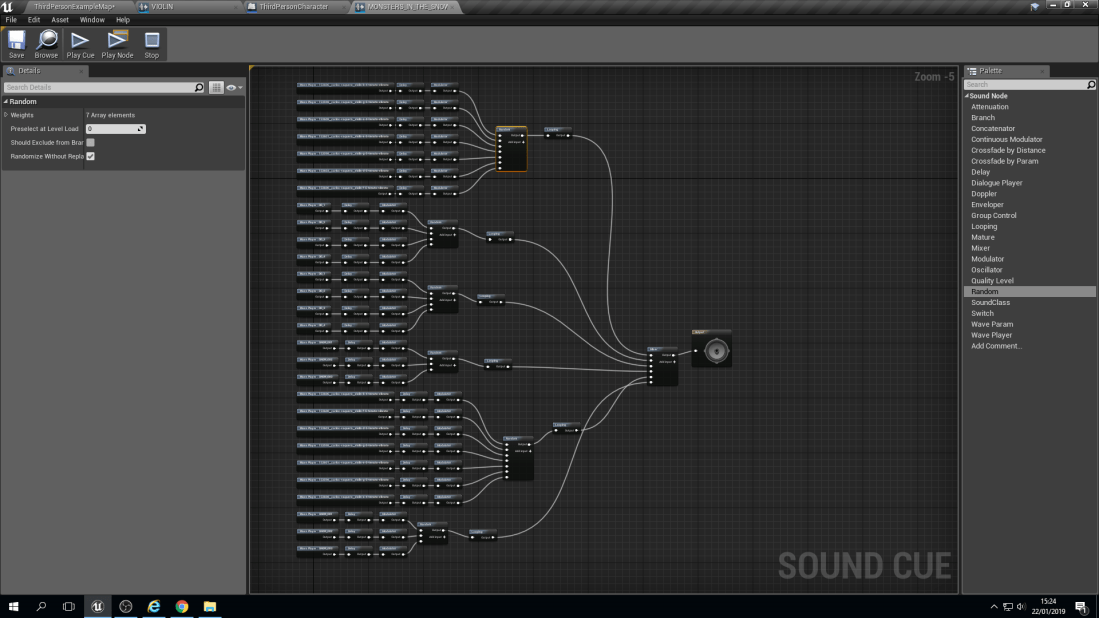
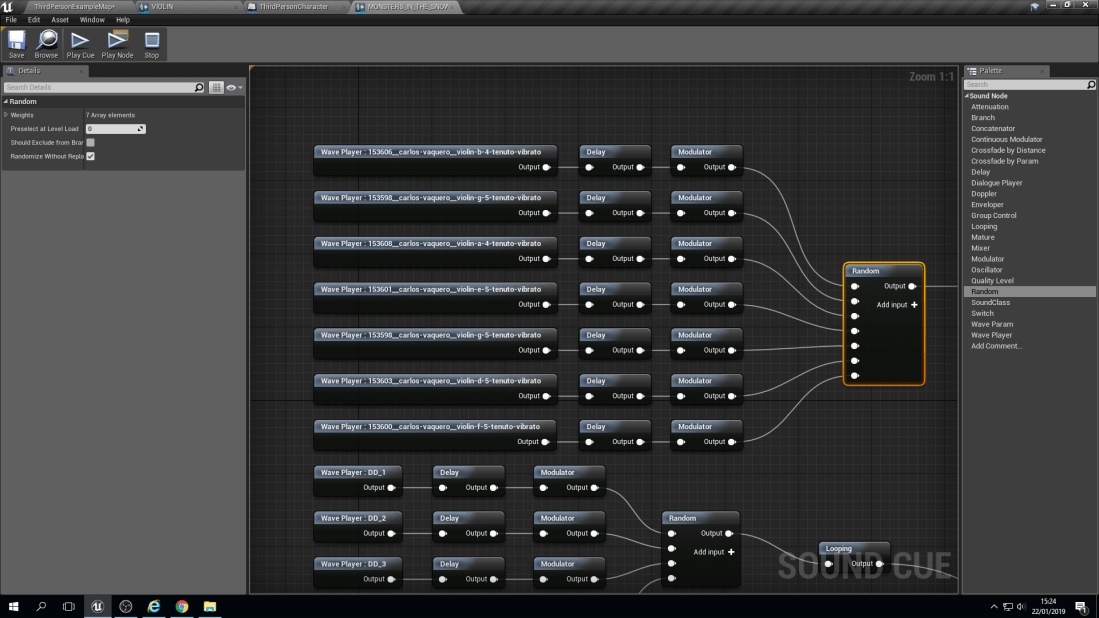
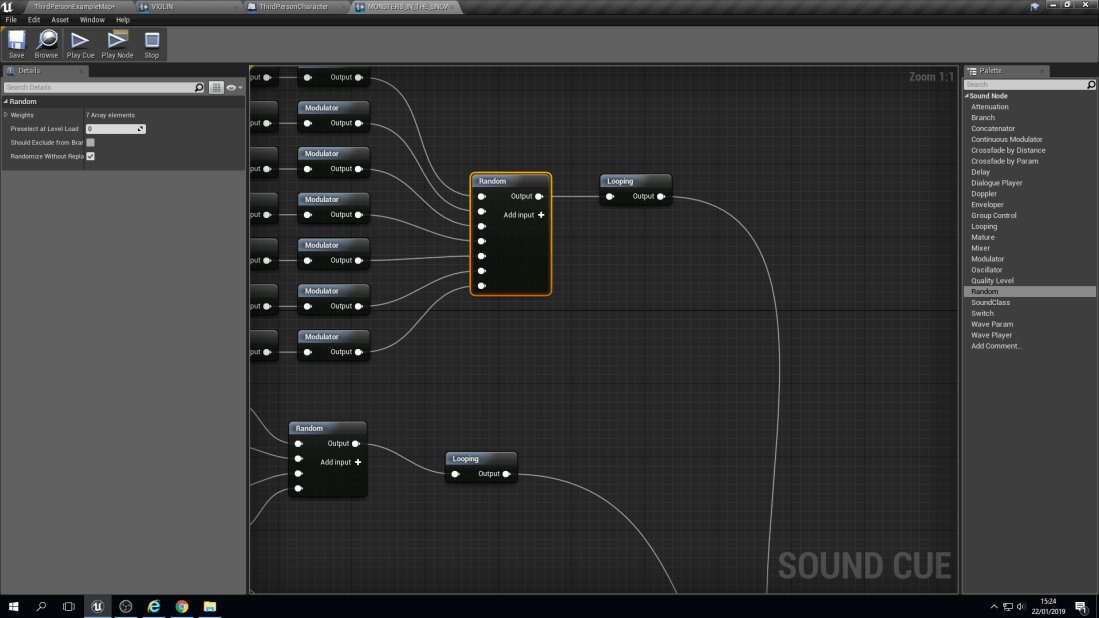
With this blueprint it does look very complex but it’s not. The way that they have been separated is into Chords. A chord is made up of 3 notes on a piano. For example, a ‘C’ chord would be ‘C’, ‘E’ and ‘G’. Then they are all individually linked up to a node known as a ‘Delay’. A delay does as it says in it’s name, It delays the sound from playing from a lowest point of delay to a highest. For example, A ‘G’ note could have a 1 second to 3 seconds delay, meaning it can play anywhere between those two numbers but no lower than 1 second and no longer than 3 seconds.

Mini-Maps: Frustration And Simplicity:

screenshot (9)


What Is A ‘Mini-Map’?:

A ‘Mini-Map’ is known to be used for open world games, such as RPG’S (Role-Playing Games) Or typical open world games. An example of this would be Legend Of Zelda: Breath Of The Wild. With ‘Open World’ games, they’re known to be extremely large, since the ‘Open’ in the name that they’re given to specify the genre of game you are playing or considering waiting to pre-order (Buying something ahead of time by making a deposit, this guarantees that you are able to get a copy of the game that you have put a pre-order down for).

For the defined definition of the term it is described to be a type of video-game that allows the player to roam freely through the virtual world (or world’s). But you are also given freedom to decide on how you complete objectives, more specifically when and how you choose to approach them. The terms “free roam”, “free-roaming” and “sandbox” are all other possible terms used to explain an ‘Open-World’ game. But they all mean the same general idea of this genre of game.

For a list of example ‘Open-World’ games, I will reccomend ones that I have personally played myself so this allows me to give my own opinion on how the ‘Mini-Map’ works, if they have one and the general way ‘Open-World’ games are in the same genre but unique in their own ways.

How Did I Make This ‘Mini-Map’?:

With this 2 day project, I was able to create this ‘Mini-Map’ with the following softwares:

  • Unreal Engine
  • Photoshop
  • Illustrator
  • Chiptone

With these following softwares, I was able to create the mini-map’s design, functions, and the overall final product because of Photoshop mainly being used (Along with Illustrator) for the final design for my mini-map along with the format file changes. It started off as a .psd (Photoshop document) to a .bmp (Bitmap) and then finally to a .png (Portable Network Graphics).

Screenshot (7).png

As you can see here, this is a Photoshop document (And a design I never used since I found a simpler yet more effective design. With the format file changes, This did cause a lot of frustration personally because all of the previously mentioned formats (Including the .png), Didn’t want to work for me. I had been dealing with this problem for over an hour assuming ti was because of the design so it changed a total of 3 times from frustration and my personal desire to fix the problem at hand.

screenshot (7)screenshot (9)screenshot (6)

Here you can see the 3 designs that I had individually designed, (Which took time which was overall unnecessary) I decided to go with the middle design, which is a simple black circle with a smaller blue circle inside. With the actual solution to my problem, (Which was just turning the opacity map on) It honestly made me feel like I had wasted time on thinking that the design was too complex or too simple.

How Complex Is A ‘Mini-Map’?:

The process may seem very easy to some people but for it being my first ever time of creating something like this I personally found it very difficult to be able to grasp the idea of having the mini-map function like it should (Which took an awfully long time to finally figure out the problem with it).

To show the overall complexity of a ‘Mini-Map’ I have taken some screenshots of the blueprint needed to show the complexity of it. I understand that this blueprint is quite short but there was steps required to make the widget, make sure it functioned and then even create a paper sprite to connect to a spring arm which connects to the player.  (What this does is that the spring arm will connect to the player directly, which means whenever the player moves, the blueprint is programmed to make the paper sprite of my marker move with the player.

screenshot (1)screenshot (2)screenshot (3)

As you can see in the first three images, These are the blueprints for controlling the widget which controls the ‘Mini-Map’ coming off and onto the screen. This is controlled by the widget which will play 2 different sounds. One for the ‘Mini-Map’ coming onto the screen, And one for when it disappears from the screen. (This function is controlled by pressing the ‘m’ key on your keyboard. I made the ‘m’ key, The keyboard shortcut because of the letter being quite easy to be associated with opening and closing a map.


screenshot (10)screenshot (11)screenshot (12)

With doing my research on ‘Mini-Maps’ I found the design aspect of having your 4 main compass points on the ‘Mini-Map’ to show which direction is North, South, Etc. But I soon scrapped this idea since what was the point of having compass directions for an open world game? The whole point of open world games is to explore and discover. Not to have a ‘Mini-Map’ show which way is North.


screenshot (13)screenshot (5)

Here in these two screenshots, It shows that I used a free online software called ‘Chiptone’ for my two sounds for the ‘Mini-Map’ being turned on and off.

Where Did Things Go Wrong?:

screenshot (4)

This screenshot shows that the widget for the ‘Mini-Map’ is functional but it doesn’t show the actual ‘Map’. This was the stage where I was frustrated because so many problems happening at once. This includes the previously mentioned file format problem.

Land Of The Dead: Post-Production’s Final Evaluation

What Went Well In The Project?:

With the overall project, which was in collaboration with Joseph Hannon, the teamwork that we both had and the clear and precise communication really aided us in putting this project together.

Another thing that went well was the schedule and time keeping skills that we both had. Since we were given 4 days for production of the project, the first two were used for making all the textures, 3D polygon models, animations, sounds, etc. The final two days were used for importing everything into the game engine (Unreal Engine 4) and then placing all the polygon models into separate blueprints so that when we needed a certain piece, for example a gate corner, we had the piece already made so we didn’t have to waste time creating them over and over again.

A final thing that had went well for the production of this project would be that we never had any problems with any of the softwares crashing while we were working or losing our work. This may have been because I had labelled every texture that I worked on accordingly and made sure that I saved regularly so that if anything had happened I would have something to work on.

What Did I Personally Set Out To Achieve With This Project?:

With the project, I personally wanted to show that I have improved as a ‘Games Design Student’ as I have learned so much from my last project as I have personally learned and gained more confidence with 3D Studio Max as a few weeks ago I didn’t like the software as I found it hard and complicated to make models inside of it. Another thing that I wanted to personally achieve with this project was to be able to help my collaboration partner and have a say in the project’s development on his and my side. This is not only decision making skills but communication and being able to compromise.

Did I Achieve My Personal Aims?:

With the personal aims/targets that I have set for myself, I feel like I have achieved them but not to my own personal standards. With showing that I have improved I know that I’ve showed it with the overall outcome of the project but I know personally that I’m not entirely happy with the project’s outcome. This is because of knowing my own capabilities and that I can step up to the challenge. I personally believe that I just made a safe move by doing another graveyard where I could have done something different, like an ‘Alice In Wonderland’ inspired environment with items being all over the place and there being bright, pastel colours.

What Didn’t Go So Well With The Project?:

With this project, It was a very successful production experience however, One thing that didn’t work as I would have liked was the character rig. We had two days to make it and the process of it being created was rushed. The limbs and joints could have had some more complex shapes rather than just having cubes/cuboids.

What Would I Change Next Time?:

Next time, When the next project comes along I will make sure to make it more challenging to push myself as I know that I will keep on improving and making mistakes to help me learn and gain knowledge for the next project.

Land Of The Dead: Production Day 3:

Day 3 of production wasn’t the best day so far. This is because of how frustrating it was to solve problems happening with all of the softwares I was using in collaboration with Joseph Hannon.

This slideshow requires JavaScript.

With all of the work that myself and Joseph have done over the past 3 days, for the fourth and final production day we are really bringing out all of the tools and tricks we have learned to make this graveyard as scary and realistic as possible. This does include some textures needing to be fixed, atmospheric fog and a night-sky dome but these will keep us busy for the fourth day which we have planned for it to be about final touches and adding smaller details.

As a quick side note, as this is being published all of the progress we made on the third day is no longer on my hard drive. I’m not sure how this occurred but as a result of this things will have to be cut out of the final end product so that we can meet our deadline.

Land Of The Dead: Production Days 1 And 2:

With the first day of production, I was making sure that the textures were completed and looking to the idea and theme that we had, which is a graveyard.

This slideshow requires JavaScript.

Here you can see the long process of how I have created some of the textures for our environment like game. The reason why I didn’t show every single texture is because of the number of textures I had created would have easily taken up over 100 screenshots.

For the second day, I was yet again focused on textures for most of the day but this time it was mainly testing the textures out on the 3D models, creating normal, diffuse and specular maps, and finally having a photoshop file copy and a bitmap copy.

Eadweard Muybridge: Who He Was And What He Did:

Eadweard Muybridge was known for his discovery of stop motion animation. This means that in his early study of photography he was able to capture motion in single framed images. This means when they’re played at 40 or more frames per second it tricks our eyes and mind into it actually moving when it’s just rapidly changing photographs.

This slideshow requires JavaScript.

As you can see, the multiple pictures taken show us the process of movement that a horse will take to run. But this also showed how to make animations because without this study, there would be no animation like what we have today.

Simple Characters

In the third 2 day project, it was called ‘Simple Characters’. I just want to point out this project isn’t finished as I had to leave on the second day half way through because of an allergic reaction occuring.

To start off the process I began with creating cubes which would form the body parts.


Characters That Break Or Make Stereotypes (Female Protagonists):

Introduction:

In the past, there has been inequality between male and female protagonists. This is because when games were first introduced, up until even present day there aren’t too many main protagonists of the female gender. However, when there are female protagonists they’re often given exaggerated features that aren’t necessarily needed. Some example of this would be:

Samus Aran (Zero-Suit And Suit) (Metroid):

With Samus Aran, the main protagonist of the entire Metroid series, is known to be an hero with an armored  suit who never shows their face in the duration of most of the games until the ending scenes. This is where we see Samus Aran without the suit.


Introduction To My Blog!

Welcome to my blog! My name is Ellie-Jane and I’m a year 1 games design and development student! In this blog I will start off with the basics, leading up to my first initial project and then onto more projects as my skills will develop as I go along in this year of study.


A Little About My Course:

The course i am studying is a level 3 BTEC extended diploma in games design and development. To make it shorter its a level 3 BTEC in Games Design and Development. With this actual course, I will be studying how to use many programs (Like unreal engine 4 and ‘MAX’ which stands for 3DS Studio Max). I will also begin to learn on how to make games look like how they do and he secrets games developers use to make games under a time limit but still make them as good as possible.

My Personal Goals:

With this blog, I want to show others how the course works and also provide helpful information to anyone that I show this blog to. This is because of games developers having to know multiple pieces of software very well and have the ability to know every part of a games production from post-production to the final product.

Programs That I Use:

  • Unreal Engine Version 4.19
  • 3DS Studio ‘MAX’
  • Adobe Illustrator
  • Adobe Photoshop